You are currently viewing How to Implement Oracle Audit Vault Database Firewall (AVDF) – Part 4

How to Implement Oracle Audit Vault Database Firewall (AVDF) – Part 4

Quick Recap

In the previous post on AVDF implementation, we have initiated the building planning phase of AVDF implementation. Downloading AVDF software, Installing the Audit Vault and Database Firewall, SSH user creation, Post Installation steps for Audit Vault and Database Firewall and Updating the Host Names, etc.,
In this post, we are moving towards building the AVDF system to the next milestone.

Target Database Parameter Changes

Target system is the source system from where the information is required to be collected for Auditing or to be stored in AVDF system.

Identifying the Target System is a key action for the AVDF implementation, there are certain changes to be performed at the database level to retrieve the information required. 

For this process, some parameters are required for Oracle GoldenGate to fetch the details from the source system.

Considering the widely used 19c DB as the Target DB for this scenario.

Review details in Target Database 

show parameter compatible

show parameter audit_trail

show parameter enable_goldengate_replication

show parameter streams_pool_size

archive log list;

show parameter log_archive_dest_1

col name for a10
col force_logging for a13
select name, log_mode, open_mode, force_logging, supplemental_log_data_min from v$database;
col name for a30
col value for a15
select name,VALUE,ISSYS_MODIFIABLE from v$PARAMETER where name in ('enable_goldengate_replication','streams_pool_size','audit_trail');

Perform the changes

 As required update the required parameters.

To enable archivelog mode in the database

Check current archive status

archive log list
 
SQL> archive log list
Database log mode              No Archive Mode
Automatic archival             Disabled
Archive destination            /u02/app/oracle/oradata/orcl/arch
Oldest online log sequence     25
Current log sequence           27
 
The log mode is No Archive Mode. 
Note that Archive destination is USE_DB_RECOVERY_FILE_DEST. 
You can determine the path by looking at the parameter RECOVERY_FILE_DEST
 
show parameter recovery_file_dest
alter system set log_archive_dest_1='LOCATION=/u02/app/oracle/oradata/orcl/arch' scope = both;
 
Shutdown the database and Start database again with Mount option
shutdown immediate
startup mount
alter database archivelog;
alter database open;
 
archive log list
SQL> archive log list
Database log mode              Archive Mode
Automatic archival             Enabled
Archive destination            /u02/app/oracle/oradata/orcl/arch
Oldest online log sequence     25
Next log sequence to archive   27
Current log sequence           27
 
You can switch to the log file to see that an archive is written to archive log location.
alter system archive log current;
 SQL> host 
[oracle@ora1 ~]$ ls /u02/app/oracle/oradata/orcl/arch1_27_711369564.dbf
 
Set the current audit_trail value to none
alter system set audit_trail=none scope=spfile;
 
Set to enable goldengate replication 
alter system set enable_goldengate_replication=TRUE scope=both sid='*';
 
Set stream pool size as required, minimum should be 2GB
alter system set streams_pool_size=2G scope=both sid='*';
 
Enable force logging & supplemental log data
alter database force logging;
alter database add supplemental log data;
 
Use the above commands in the Review section to confirm the parameter changes.
 

Deploying Audit Vault Agent

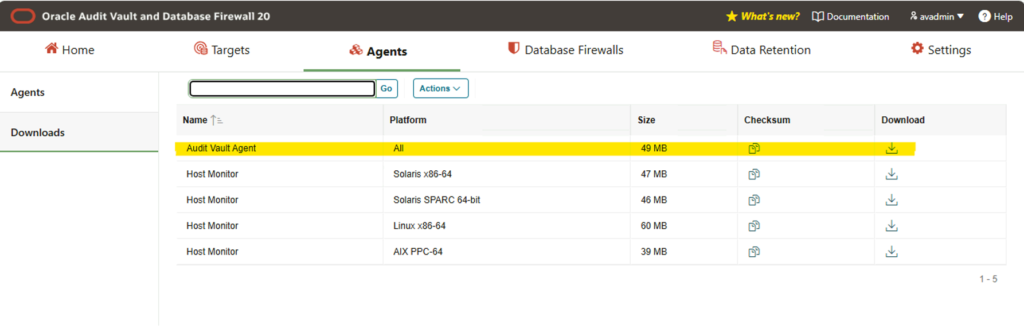
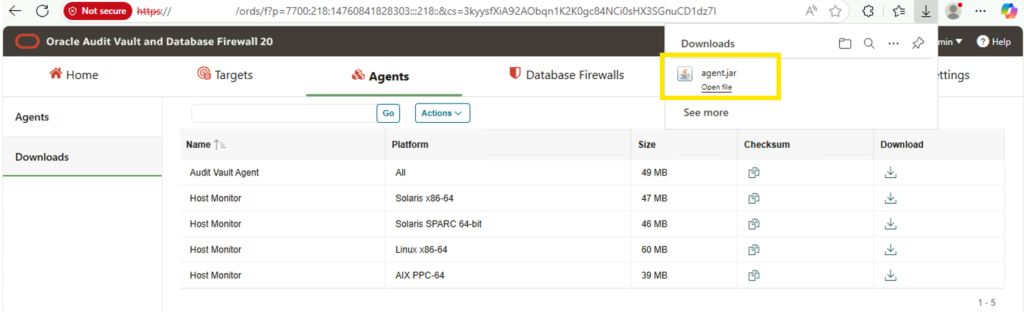
Download Audit Vault Agent from AVDF Console
Navigate: Login AV Console -> Downloads -> Name: Audit Vault Agent -> Download
 
av_agnt_dwnld
av_agnt_dwnld1
av_agnt_dwnld2

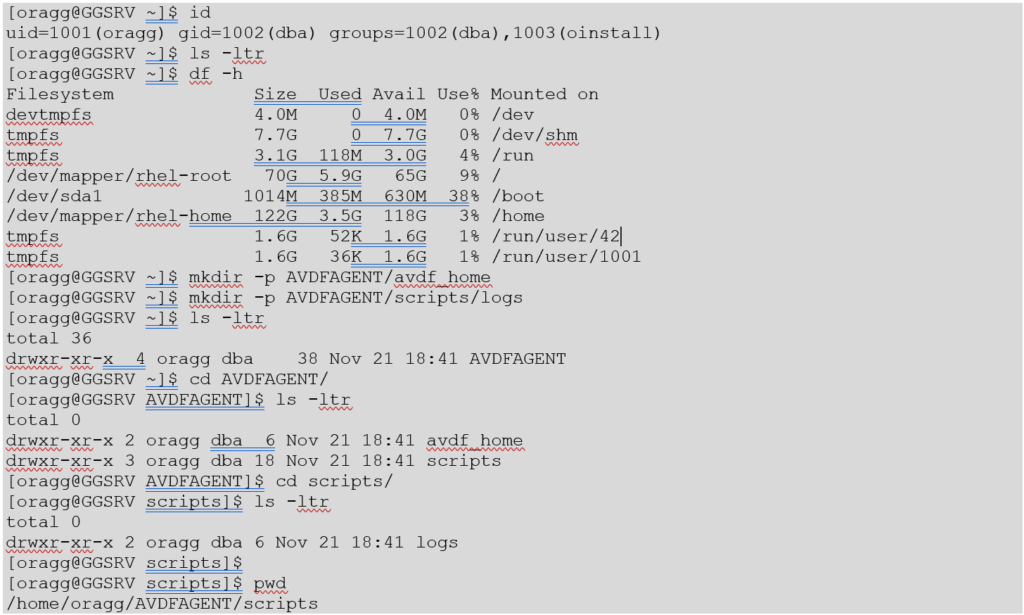
Create directories for AVDF in GoldenGate Server

In this scenario, using the golden gate server for AVDF agent deployment and GoldenGate XML caputre.

Follow the previous posts, to create the OS user in GoldenGate server, once done follow the below steps.

su – oragg

id

ls -ltr

df -h

mkdir -p AVDFAGENT/avdf_home

mkdir -p AVDFAGENT/scripts/logs

ls -ltr

cd AVDFAGENT/

ls -ltr

cd scripts/

ls -ltr

pwd

dir_crt_for_av_agnt

Download Java and Export Java Path

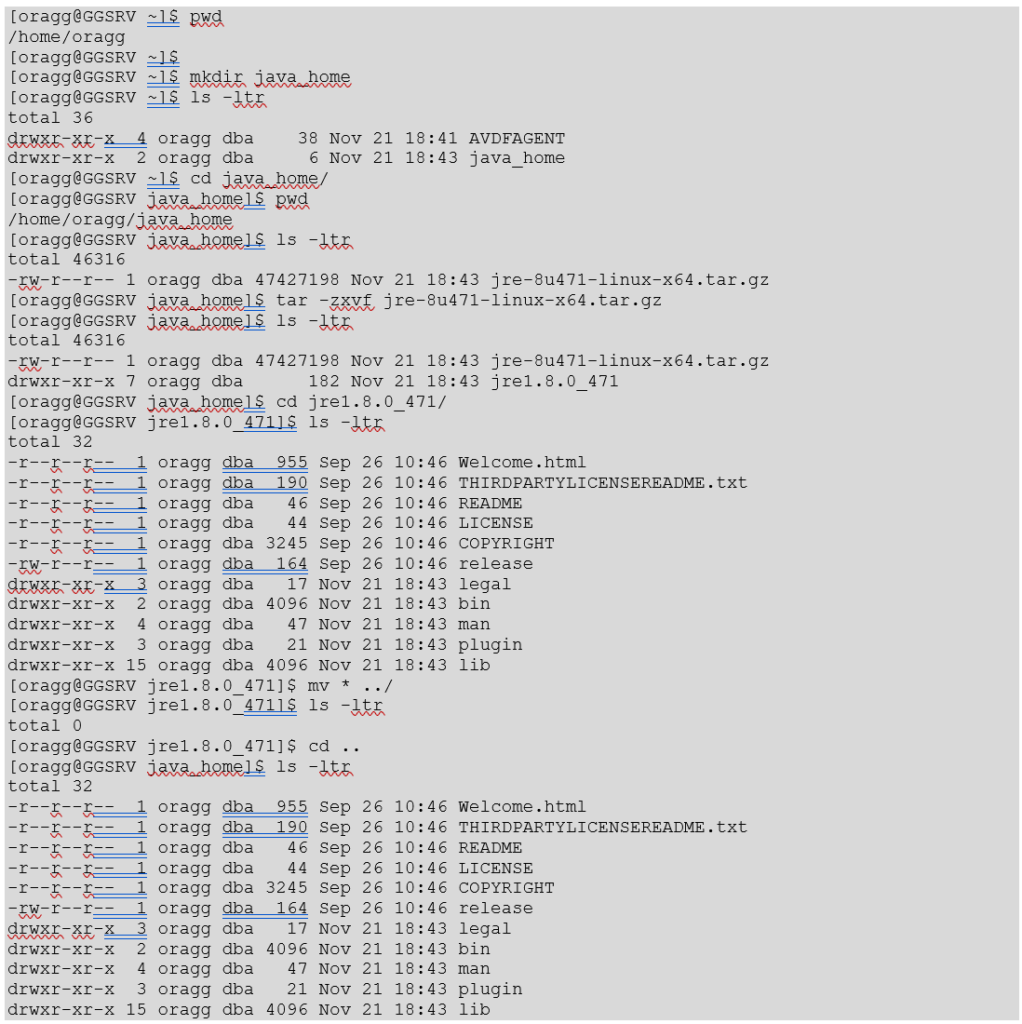
Download the supported java for the OS and move to a location in the server.

pwd
ls -ltr
mkdir java_home
cd java_home
tar -zxvf jre-8u471-linux-x64.tar.gz &
ls -ltr
cd jre1.8.0_471
mv * ../
ls -ltr
cd ..
ls -ltr

java_unzip_ggsrv

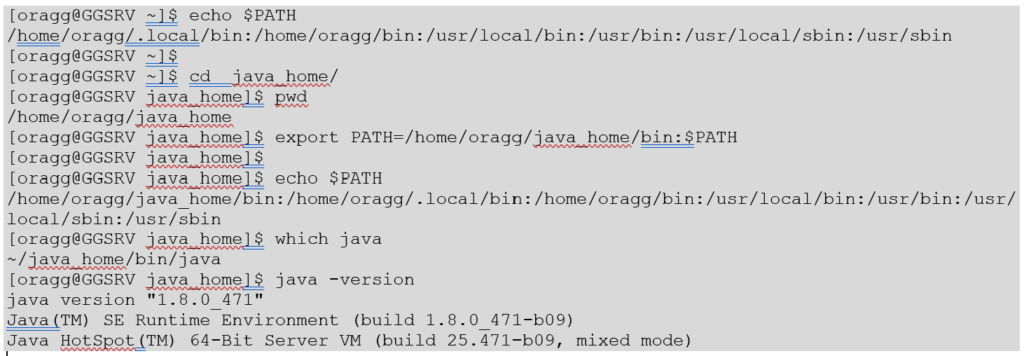
Verify the Java details

echo $PATH
export PATH=/home/oragg/java_home/bin:$PATH
echo $PATH
which java
java -version

java_unzip_ggsrv_verf

Copy agent.jar to Target location

cd /home/oragg/AVDFAGENT/avdf_home

ls -ltr

cpy_agnt_to_loc

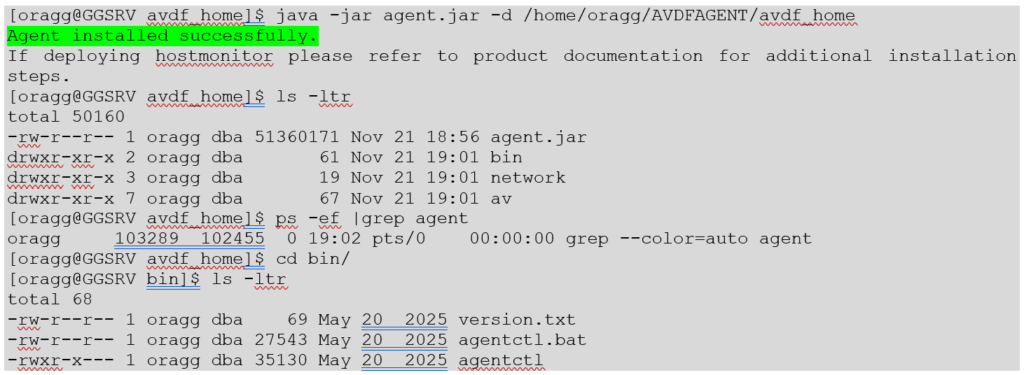
Deploy Audit Vault Agent

java -jar agent.jar -d /home/oragg/AVDFAGENT/avdf_home
ls -ltr
ps -ef |grep agent
cd bin
ls -ltr

agnt_install

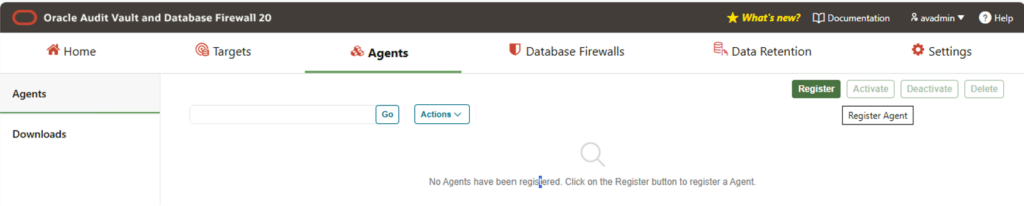
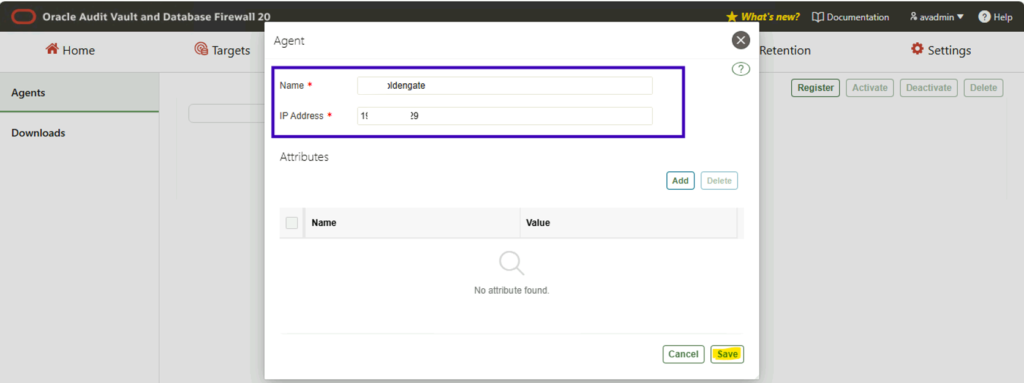
Register Audit Vault Agent in AV Console
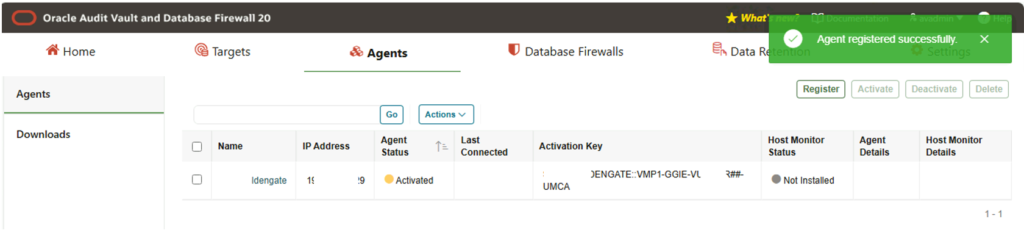
Navigate: Login AV admin -> Agents -> Register -> Enter Name & IP Address -> Save

reg_av_agnt
reg_av_agnt1
reg_av_agnt2

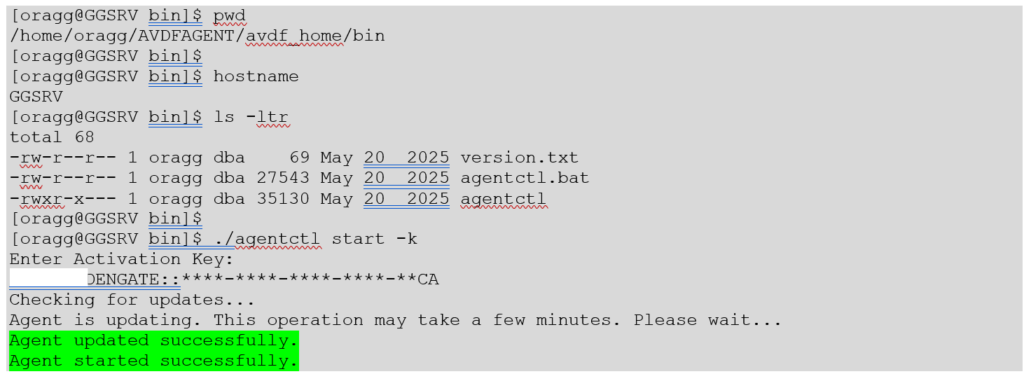
Activate Audit Vault Agent in Target

pwd
ls -ltr
hostname
./agentctl start -k

act_av_agnt

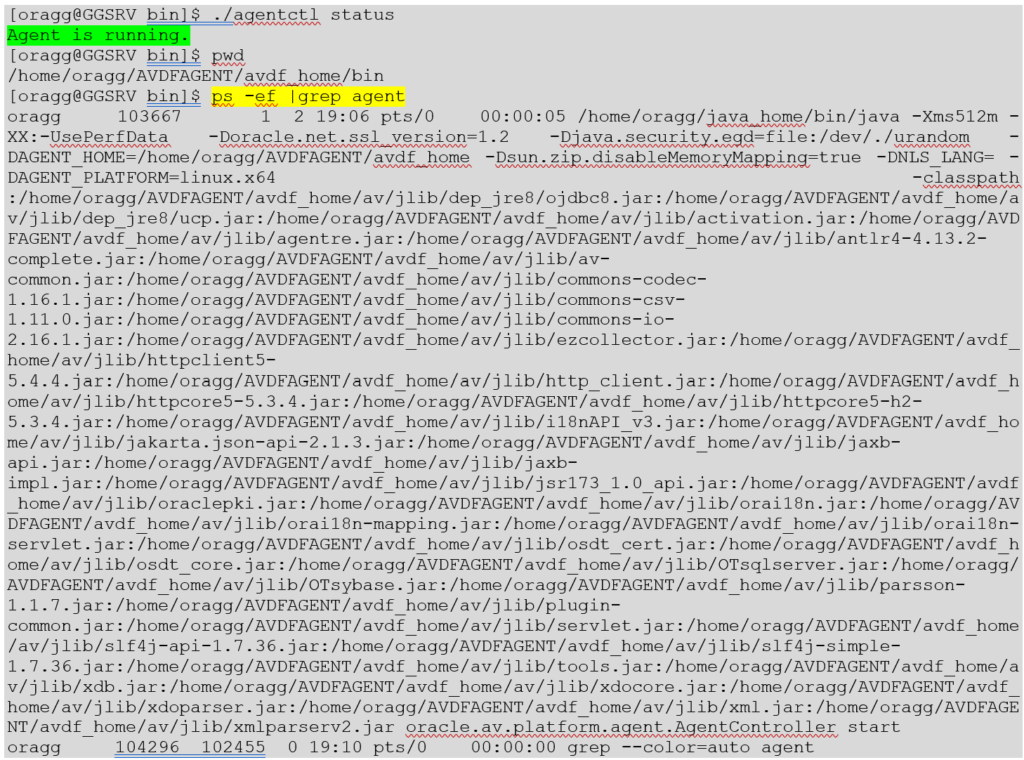
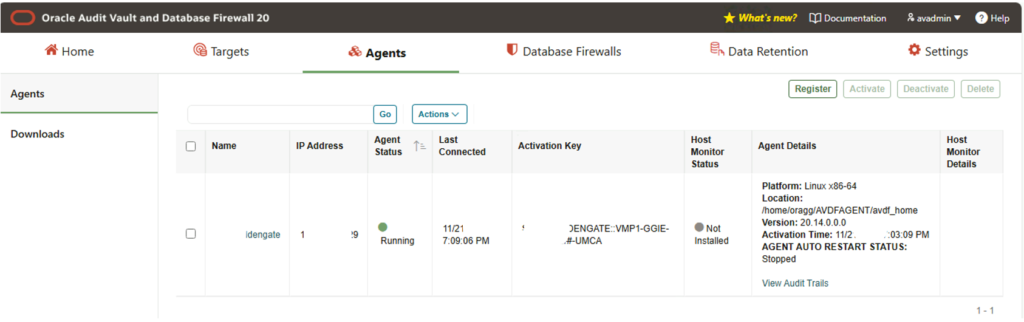
Verify Audit Vault Agent Status

./agentctl status
pwd
ps -ef |grep agent

vrf_av_agnt_status
vrf_av_agnt_status1

Implement Agent Start and Stop Scripts

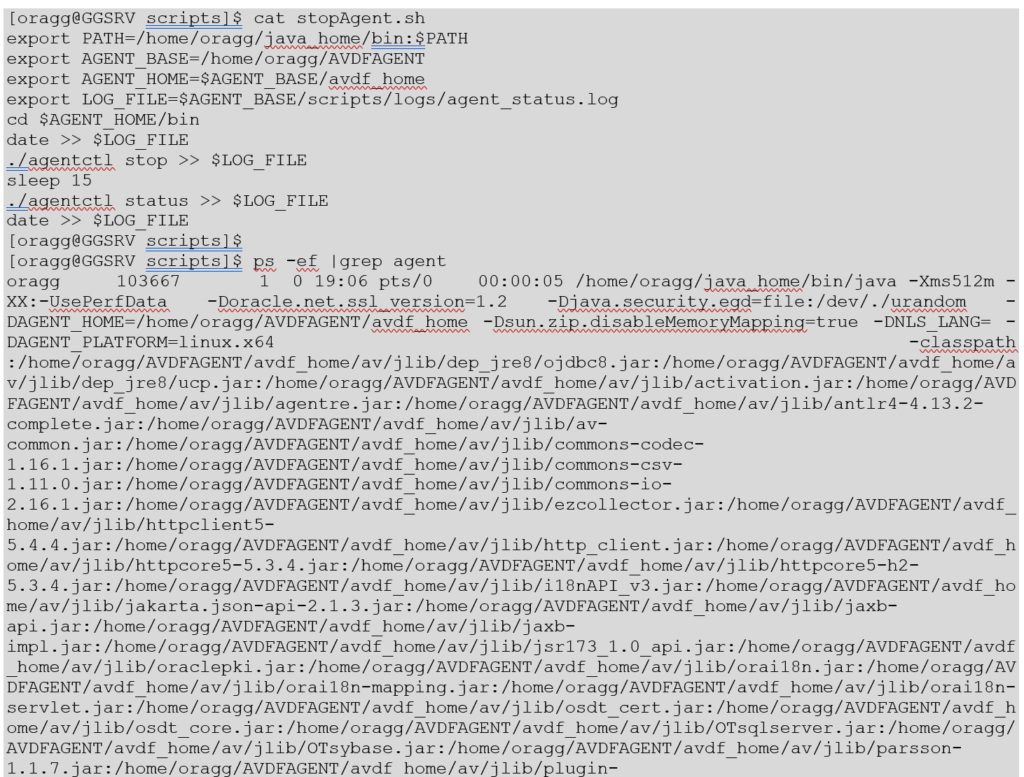
Instead of manually navigating and performing start and stop activities of the agent, below script is created and used for these actions.

cd /home/oragg/AVDFAGENT/scripts

ls -ltr

Stop script

vi stopAgent.sh

export PATH=/home/oragg/java_home/bin:$PATH
export AGENT_BASE=/home/oragg/AVDFAGENT
export AGENT_HOME=$AGENT_BASE/avdf_home
export LOG_FILE=$AGENT_BASE/scripts/logs/agent_status.log
cd $AGENT_HOME/bin
date >> $LOG_FILE
./agentctl stop >> $LOG_FILE
sleep 15
./agentctl status >> $LOG_FILE
date >> $LOG_FILE

cat stopAgent.sh
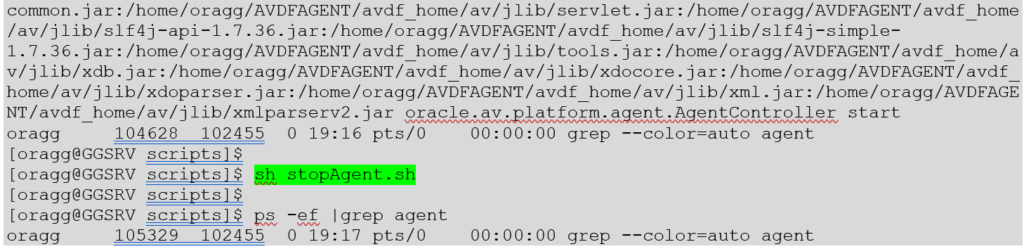
ps -ef |grep agent
sh stopAgent.sh
ps -ef |grep agent

scpts_stop
scpts_stop1

cd logs

ls -ltr

cat agent_status.log

scpts_stop2

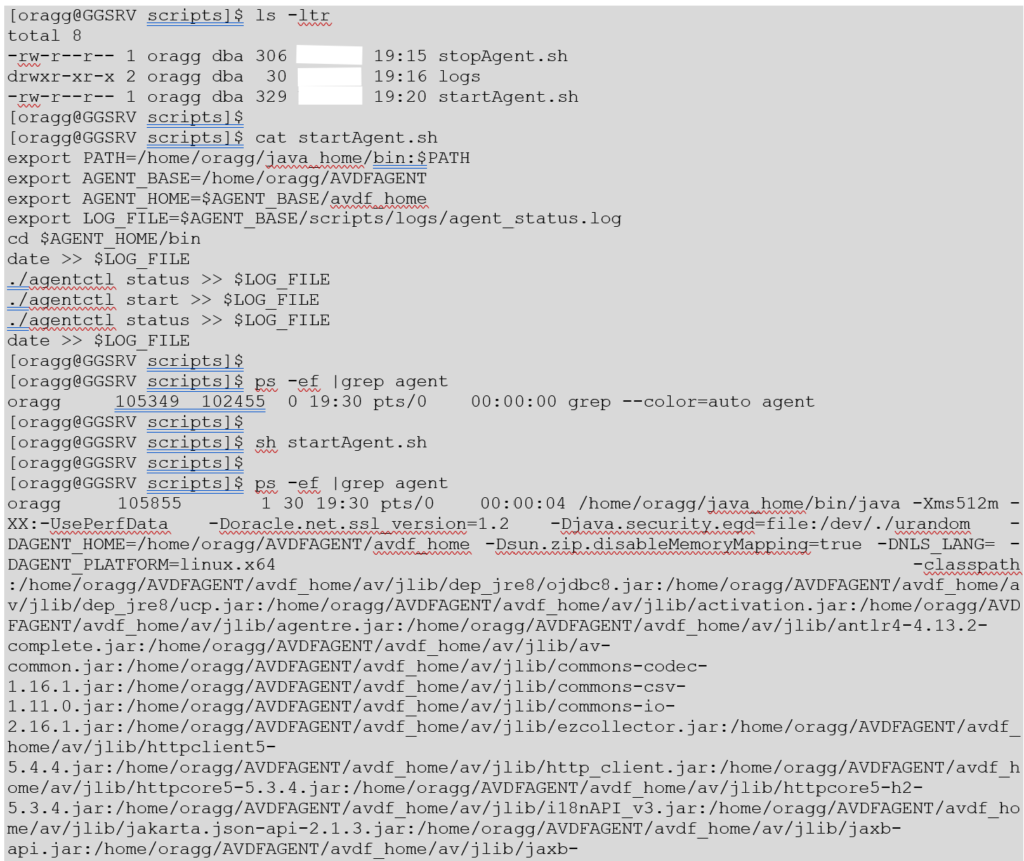
Start script

cd /home/oragg/AVDFAGENT/scripts

vi startAgent.sh

export PATH=/home/oragg/java_home/bin:$PATH
export AGENT_BASE=/home/oragg/AVDFAGENT
export AGENT_HOME=$AGENT_BASE/avdf_home
export LOG_FILE=$AGENT_BASE/scripts/logs/agent_status.log
cd $AGENT_HOME/bin
date >> $LOG_FILE
./agentctl status >> $LOG_FILE
./agentctl start >> $LOG_FILE
./agentctl status >> $LOG_FILE
date >> $LOG_FILE

ls -ltr

cat startAgent.sh

ps -ef |grep agent

sh startAgent.sh

ps -ef |grep agent

scpts_start

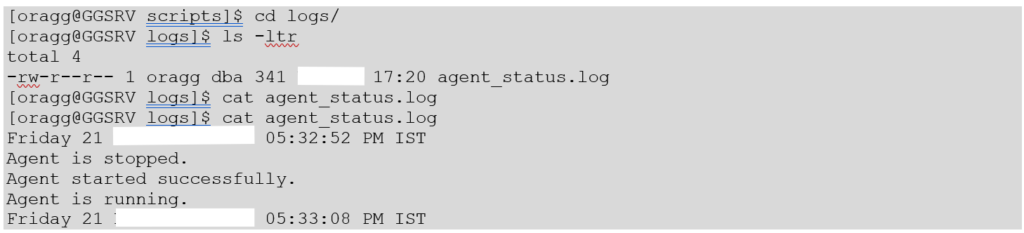
cd logs

ls -ltr

cat agent_status.log

scpts_start1

Deploying Host Monitor Agent in Target

The Host Monitor Agent captures SQL traffic from the network interface card of the host machine that is running the target database and securely forwards it the Database Firewall.

Validate Symlinks and Create if not exists

Use the below commands to validate the symlinks and create if not available in target server

ls -lrt /lib64/libcap*
ls -lrt /lib64/libaio*
ls -lrt /lib64/libnsl*
ls -lrt /lib64/libpcap*
ls -lrt /lib64/libssl*
ls -lrt /lib64/libcrypto*
ls -lrt /usr/lib/libcap*
ls -lrt /usr/lib/libaio*
ls -lrt /usr/lib/libnsl*
ls -lrt /usr/lib/libpcap*
ls -lrt /usr/lib/libssl*
ls -lrt /usr/lib/libcrypto*

As root user:
ln -s /lib64/libpcap.so.1.5.3 /usr/lib/libpcap.so.1
ln -s /usr/lib/libpcap.so.1 /usr/lib/libpcap.so

Validate Package and Install if not exists

rpm -qa|grep cap
rpm -qa|grep openssl
rpm -qa|grep make
rpm -q libcap
rpm -q libcap-devel
rpm -q libpcap
rpm -q libpcap-devel
rpm -q openssl
rpm -q openssl-devel
rpm -q make

Connect as root:
yum install libpcap-devel
yum install libcap-devel
yum install openssl-devel

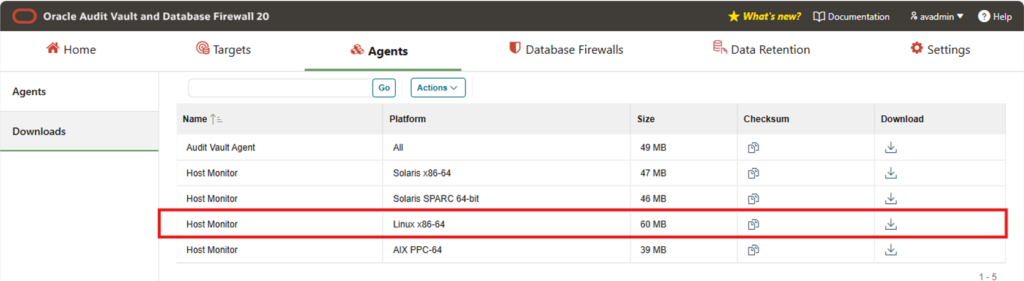
Download Host Monitor Agent from AVDF Console
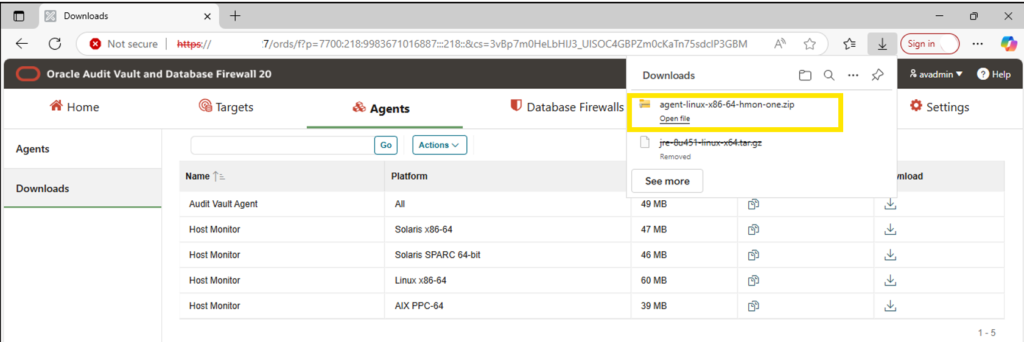
Navigate: Login AV Console as AVADMIN -> Downloads -> Name: Host Monitor (Platform required) -> Download

hst_mntr_dowld
hst_mntr_dowld1
hst_mntr_dowld2

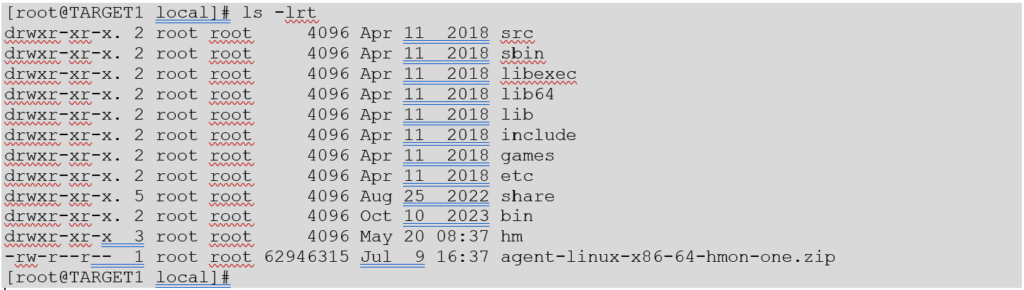
Copy and Extract Host Monitor Agent zip file to target server as root user

cd /usr/local
id
pwd
ls -lrt
du -sh agent-linux-x86-64-hmon-one.zip
unzip agent-linux-x86-64-hmon-one.zip
ls -lrt

cpy_hst_mntr_tagt

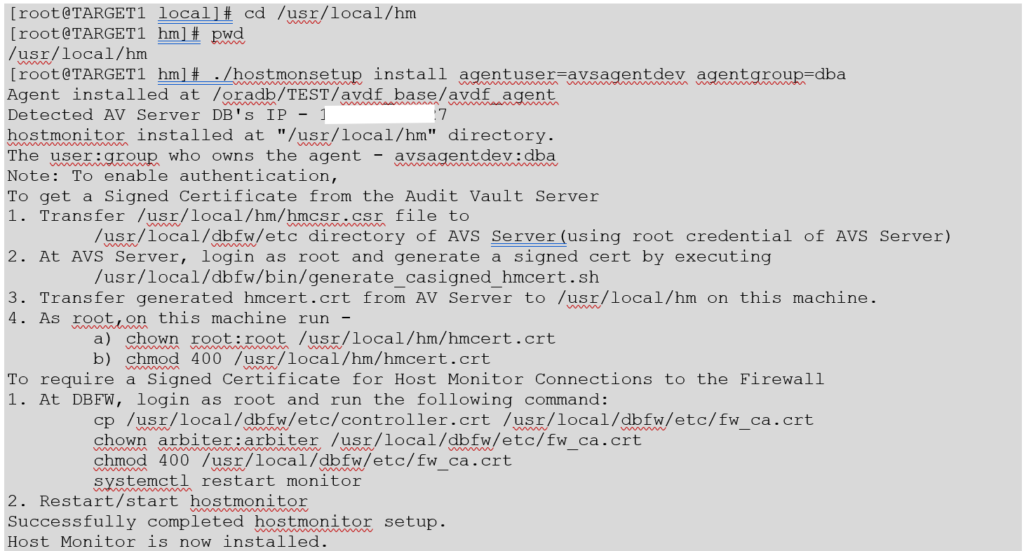
Install Host Monitor Agent in Target server as root user
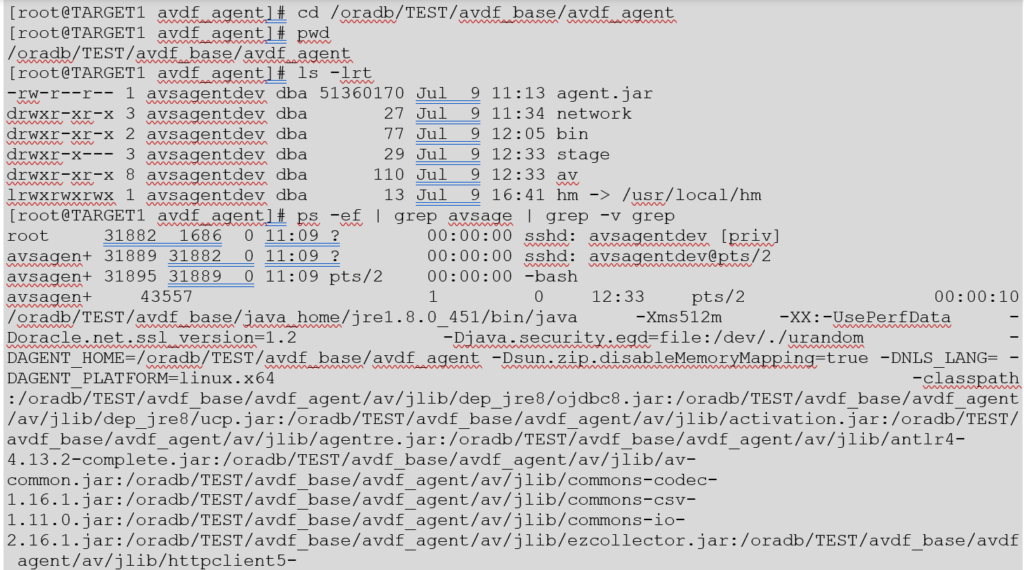
cd /usr/local/hm
pwd
./hostmonsetup install agentuser=avsagentdev agentgroup=dba
cd /oradb/TEST/avdf_base/avdf_agent
pwd
ls -lrt
ps -ef | grep avsagen

inst_hst_mntr
inst_hst_mntr1
inst_hst_mntr2

Post Install Activities

To get a Signed Certificate from the Audit Vault Server

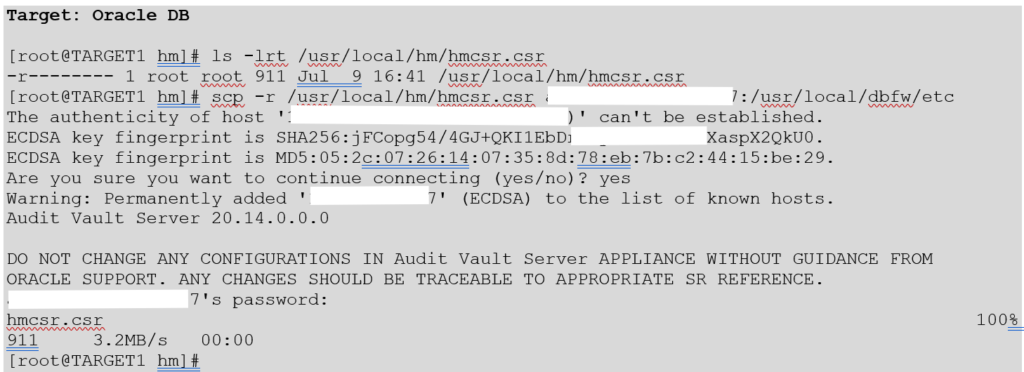
  • Transfer hmcsr.csr file to AVS Server as root User
    • In target Oracle DB Server
      ls -lrt /usr/local/hm/hmcsr.csr
      scp -r /usr/local/hm/hmcsr.csr username@<AV_server_IP>:/home/avdev
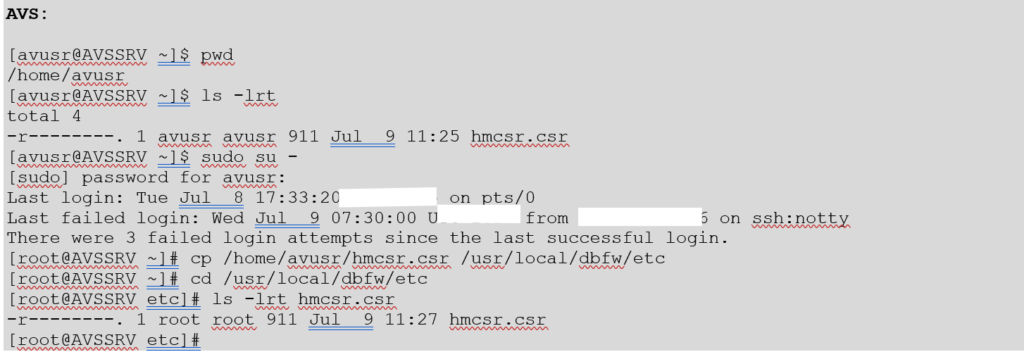
    • In AVS Server
      ls -lrt /home/avdev/hmcsr.csr
      sudo su –
      cp /home/avdev/hmcsr.csr /usr/local/dbfw/etc
      cd /usr/local/dbfw/etc
      ls -lrt /usr/local/dbfw/etc/hmcsr.csr
pst_signed_tdb
pst_signed_tdb1

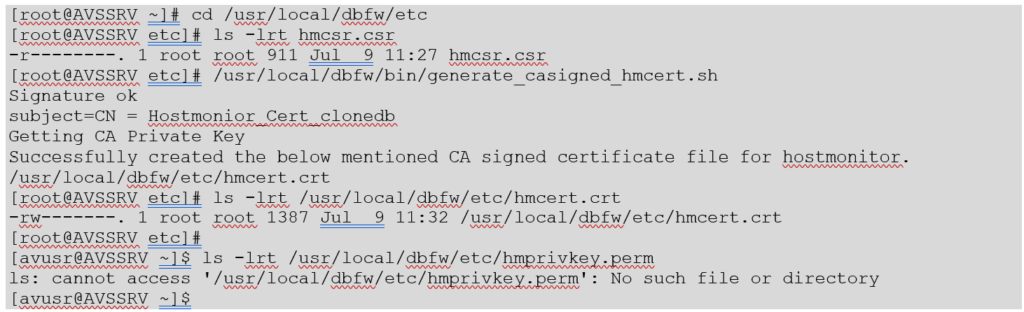
Generate a signed cert file in AVS Server as root user

cd /usr/local/dbfw/etc

ls -lrt hmcsr.csr

/usr/local/dbfw/bin/generate_casigned_hmcert.sh

ls -lrt /usr/local/dbfw/etc/hmcert.crt

ls -lrt /usr/local/dbfw/etc/hmprivkey.perm

pst_signed_tdb2

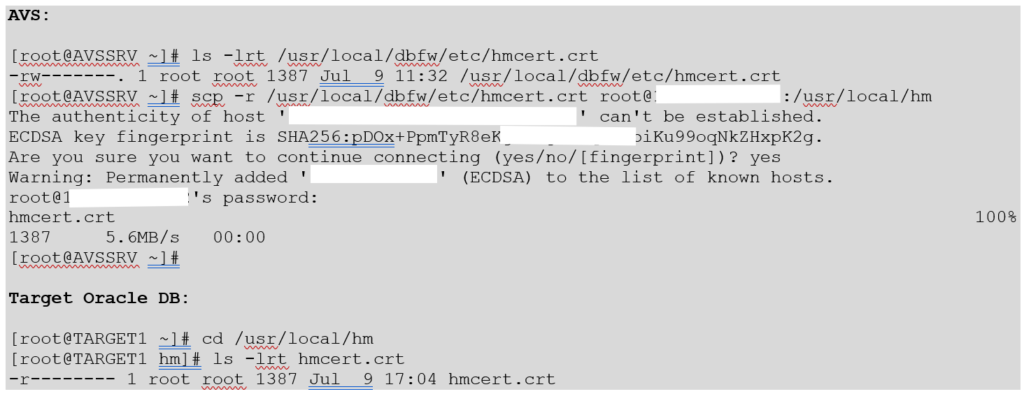
Transfer Generated hmcert.crt file to Target DB Server as root user

  • In AVS server
    ls -lrt /usr/local/dbfw/etc/hmcert.crt
    scp -r /usr/local/dbfw/etc/hmcert.crt root@<target_db_server_IP>:/usr/local/hm
  • In target Oracle DB Server
    cd /usr/local/hm
    ls -lrt hmcert.crt
pst_signed_tdb3

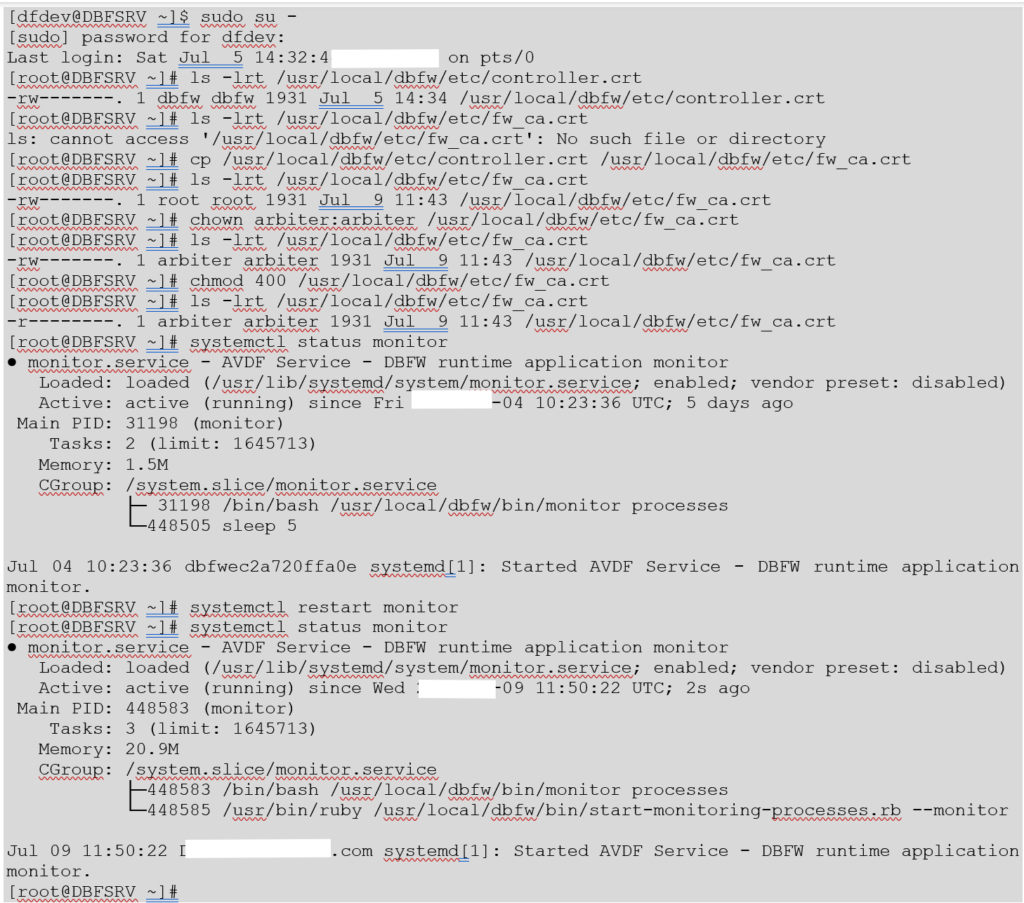
To require a Signed Certificate for Host Monitor Connections to the Database Firewall Server as root user

cp /usr/local/dbfw/etc/controller.crt /usr/local/dbfw/etc/fw_ca.crt
chown arbiter:arbiter /usr/local/dbfw/etc/fw_ca.crt
chmod 400 /usr/local/dbfw/etc/fw_ca.crt
systemctl status monitor
systemctl restart monitor
systemctl status monitor

pst_signed_tdb4

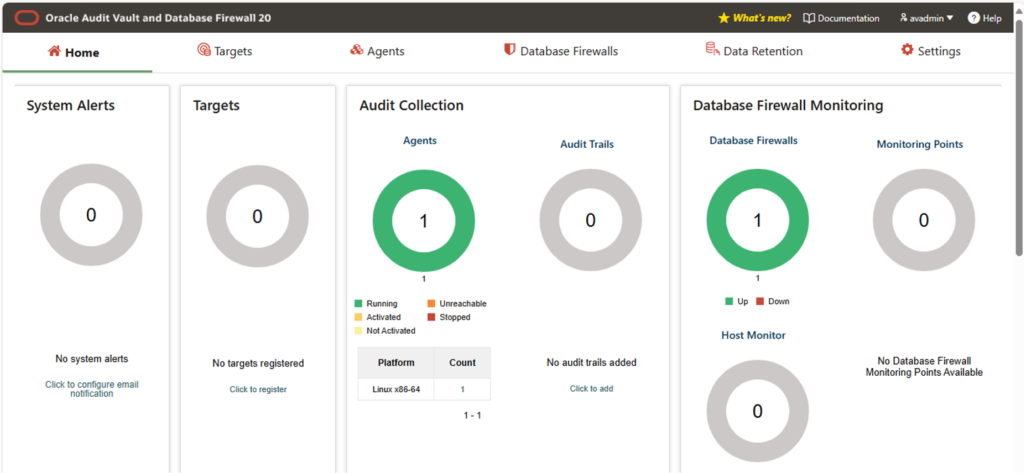
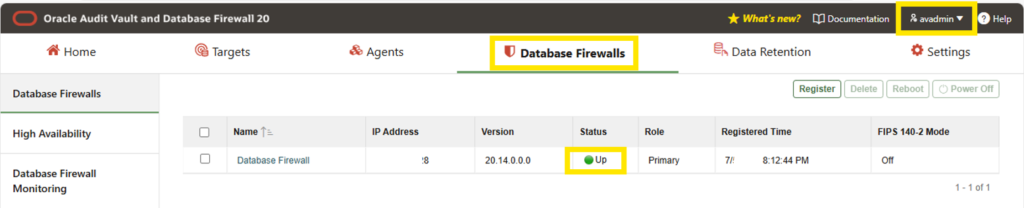
Verify Host Monitor Agent Status

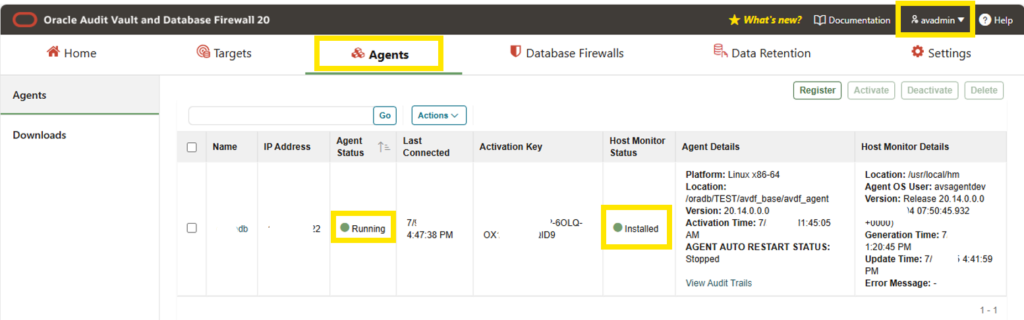
Navigate: Login AV admin -> Agents -> Host Monitor Agent Status ‘Installed’

inst_hst_mntr2
dfw_status1
dfw_status2

To Be Continued . . . 

In next post, we’ll be diving into the hands-on AV Target Configuration, Verification and Validation of Transaction Log Audit Trails retrieval, DF Target Configuration and User-defined Database Firewall Policies, etc.,